When making candies or decorations from chocolate – and I mean real chocolate, not candy wafers bought at a craft shop – the only way to achieve a shiny, snappy finish is by tempering. Professionals do it by smearing and working melted chocolate on a marble slab, but that’s generally too messy for a home kitchen. Here are two ways that home chocolatiers can get professional results, making small batches and avoiding the mess.
Why Temper?
Tempering makes chocolates glossy, preventing the frustrating, unprofessional, dull grey film that can form over improperly prepared candies or decorations. Tempered chocolate makes an audible snaps when you break it. You only need to temper chocolate that you want to set with a sheen, you do not need to temper chocolate if you are baking a chocolate cake.
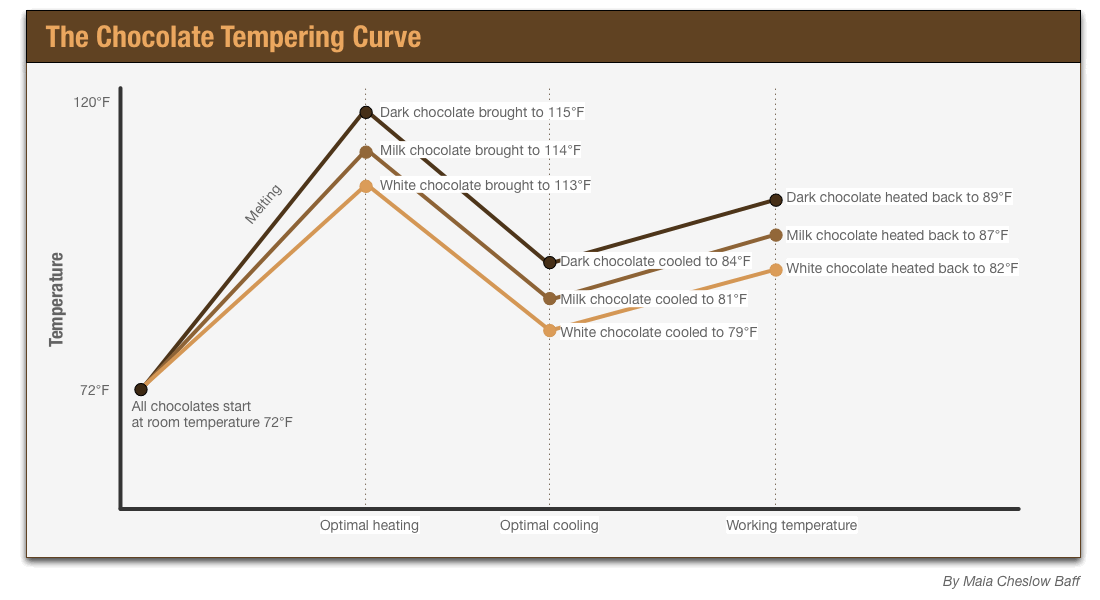
The Chocolate Tempering Curve
Due to the different ingredient mixes of dark, milk, and white chocolate their melting and optimal reforming points vary.
Two Ways to Temper Chocolate at Home
The temperatures in the processes below are for dark chocolate and should be adapted based on the chocolate tempering curve for milk or white.